$ Final Project
───────────────────────────────────────────────────────────
Final Project: Melodicam
Project Overview:
For my final project, I created a camera that can take a photo of you, determine your vibe, and translate that photo into a song!
I introduce to you, the Melodicam!
MELODICAM
MELODICAM DEMO
Week 5 Update
FUSION JUKEBOX MVP
JUKEBOX VIDEO MODEL
Plan
    For my final project, I want to pursue the idea of having a jukebox that can both move a CD and play music through Bluetooth. While the initial idea
    was to investigate only the idea of rebuilding an old jukebox from things like cams and other mechanical parts, I have decided that I can still fulfill
    my goal of investigating inconvenience by creating what is more of a jukebox speaker, but one that should allow for all of the highly tactile parts to be used as well.
    It should be easy to use, like modern speakers, but with the added retro elements.
Materials
- Second-hand Bookshelf Speaker (~ $30)
- Bluetooth Amplifier (~ $15)
- Wood for enclosure
- PLA filament for smaller parts
- Nails and screws to hold together the enclosure
- Large, lit buttons created from acrylic
- Microcontroller
- Motors
- Wiring
Timeline
- Week 5–6: Finalize 3D design
- Week 7: Enclosure CAD, mechanical mockup, order materials
- Week 8: Electronics breadboard, Bluetooth test
- Week 9: Laser Cut Enclosure, Buttons
- Week 10: Assemble, wire, firmware
- Week 11: Debugging and final assembly, decorations/exterior
- Week 12: Polish, documentation, presentation
Week 11 Update: Project Integration
3D PRINTED FRAMES
CIRCUIT BOARD
WOODEN MVP
Documentation:
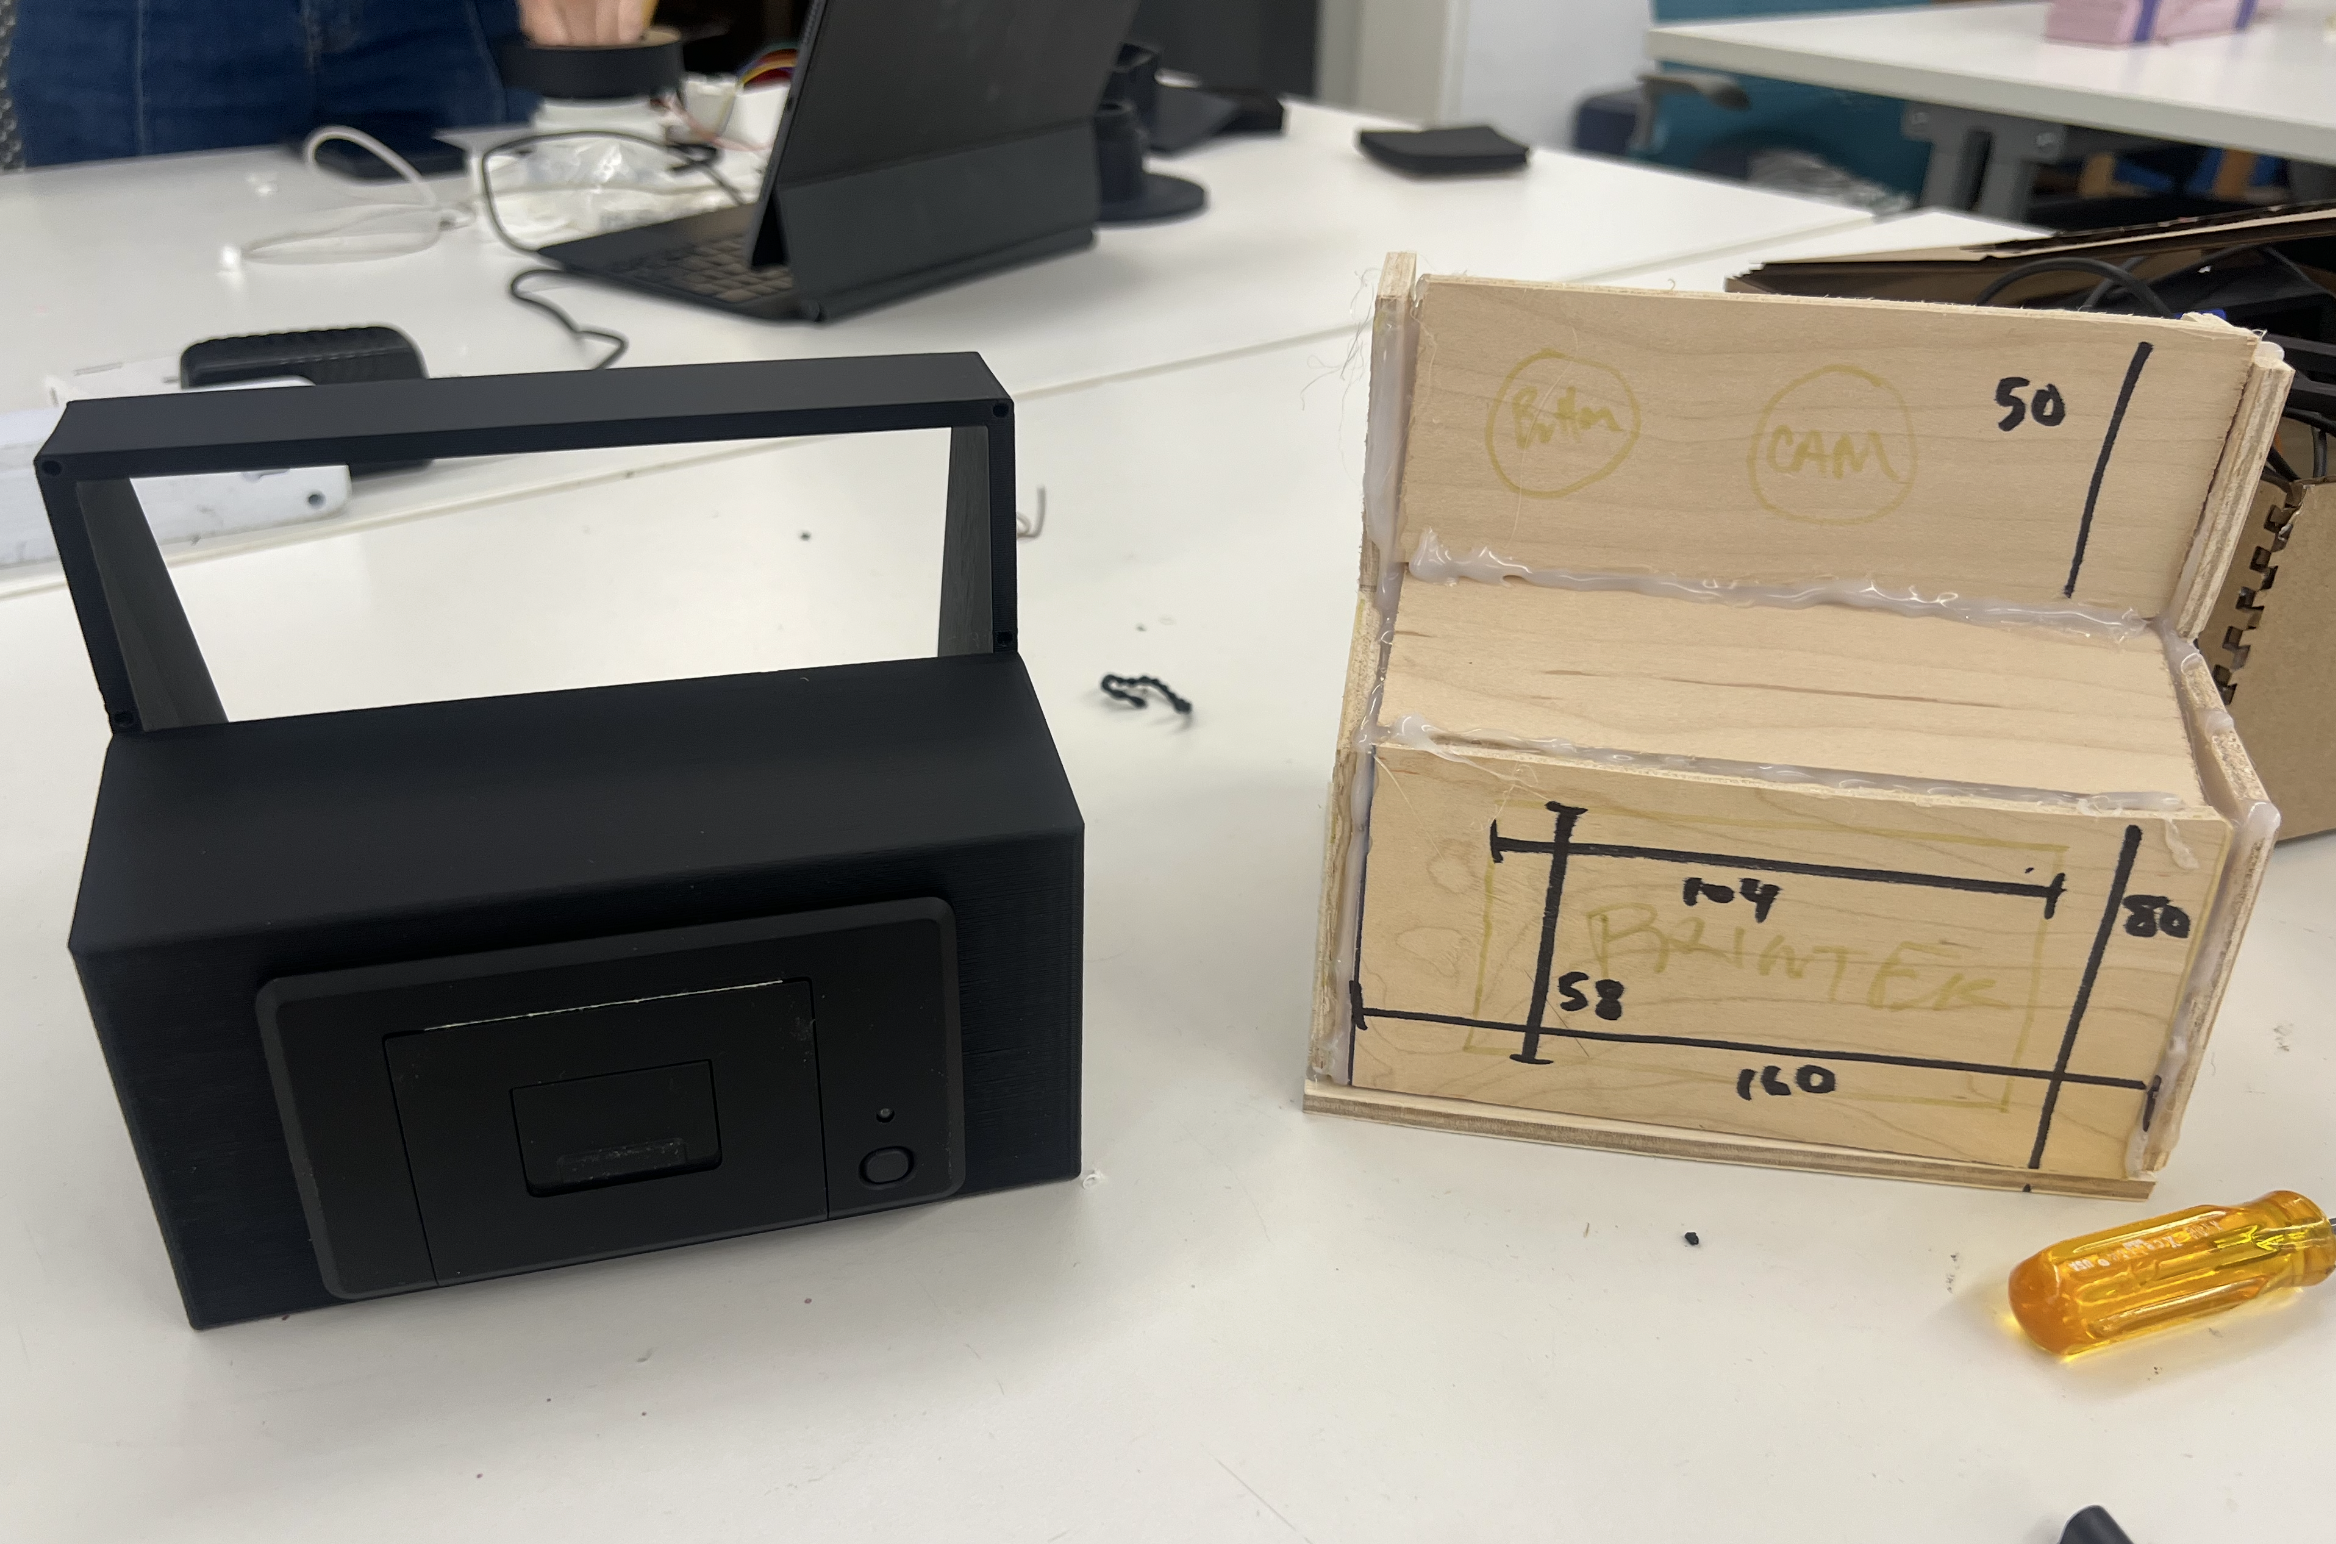
For this week, I was able to get my project rolling in a number of different ways. First of all, I pivoted on the design of the camera, as the form factor of each individual piece of hardware is larger than I was planning,
from a modern digital camera design to a classic vintage Polaroid, so it is bigger and still handheld, but not able to be tucked into a bag. I also tested some of the fit tolerances for the consistently sized pieces of input and output
that I will need to integrate into the final design, and have 3D printed some housing elements in order to test whether or not things will fit as they are or if I have to make some changes. I also put together a very rough
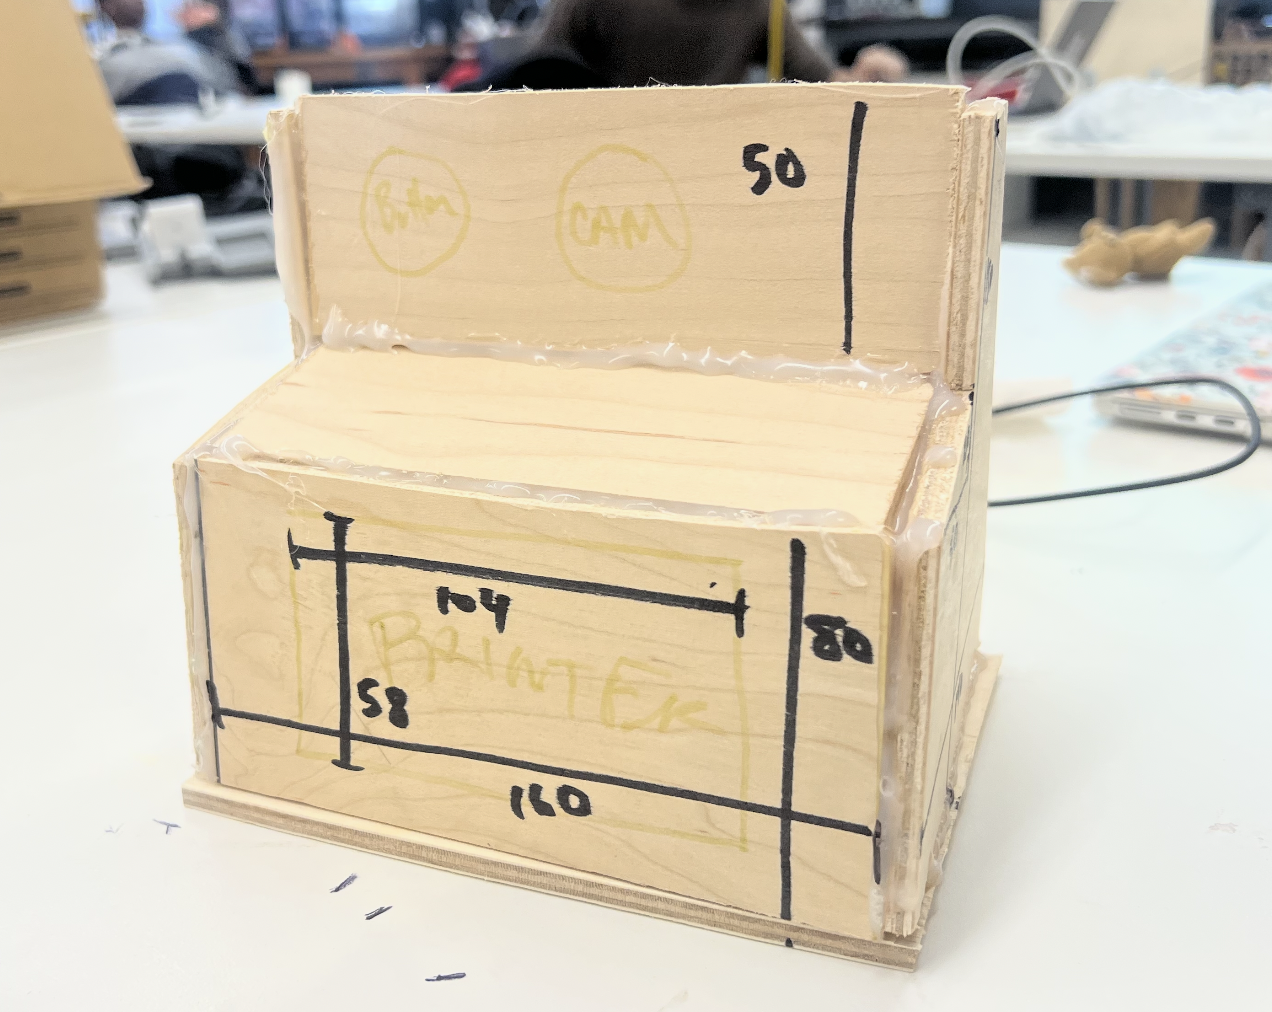
body for the camera out of hot glue and wood, which, while very temporary and not the final design, gives a good idea as to what someone would be holding when using the product. It is large,
and right now it is really rough, but it gives me a basis for measurements and will allow me to 3D design the next steps of the project while seeing what can fit inside and where. I think that one of the things I am going to have to be very careful
about down the stretch is making sure that the final design looks good, but also that things integrate into it well. What I mean by that is that I want the pieces to be able to screw on to one another. I want the battery
to fit inside it well. I want the wires to all be soldered, and I want to make sure that you no longer have to plug it into a computer. I have been having some trouble with communicating between my computer and my
camera, so that is the next thing to diagnose. At least now I know what I want it to feel like in my hand, so there is a lot of progress mentally on what the next steps will be.
───────────────────────────────────────────────────────────
FINAL UPDATE: Melodicam
Documentation:
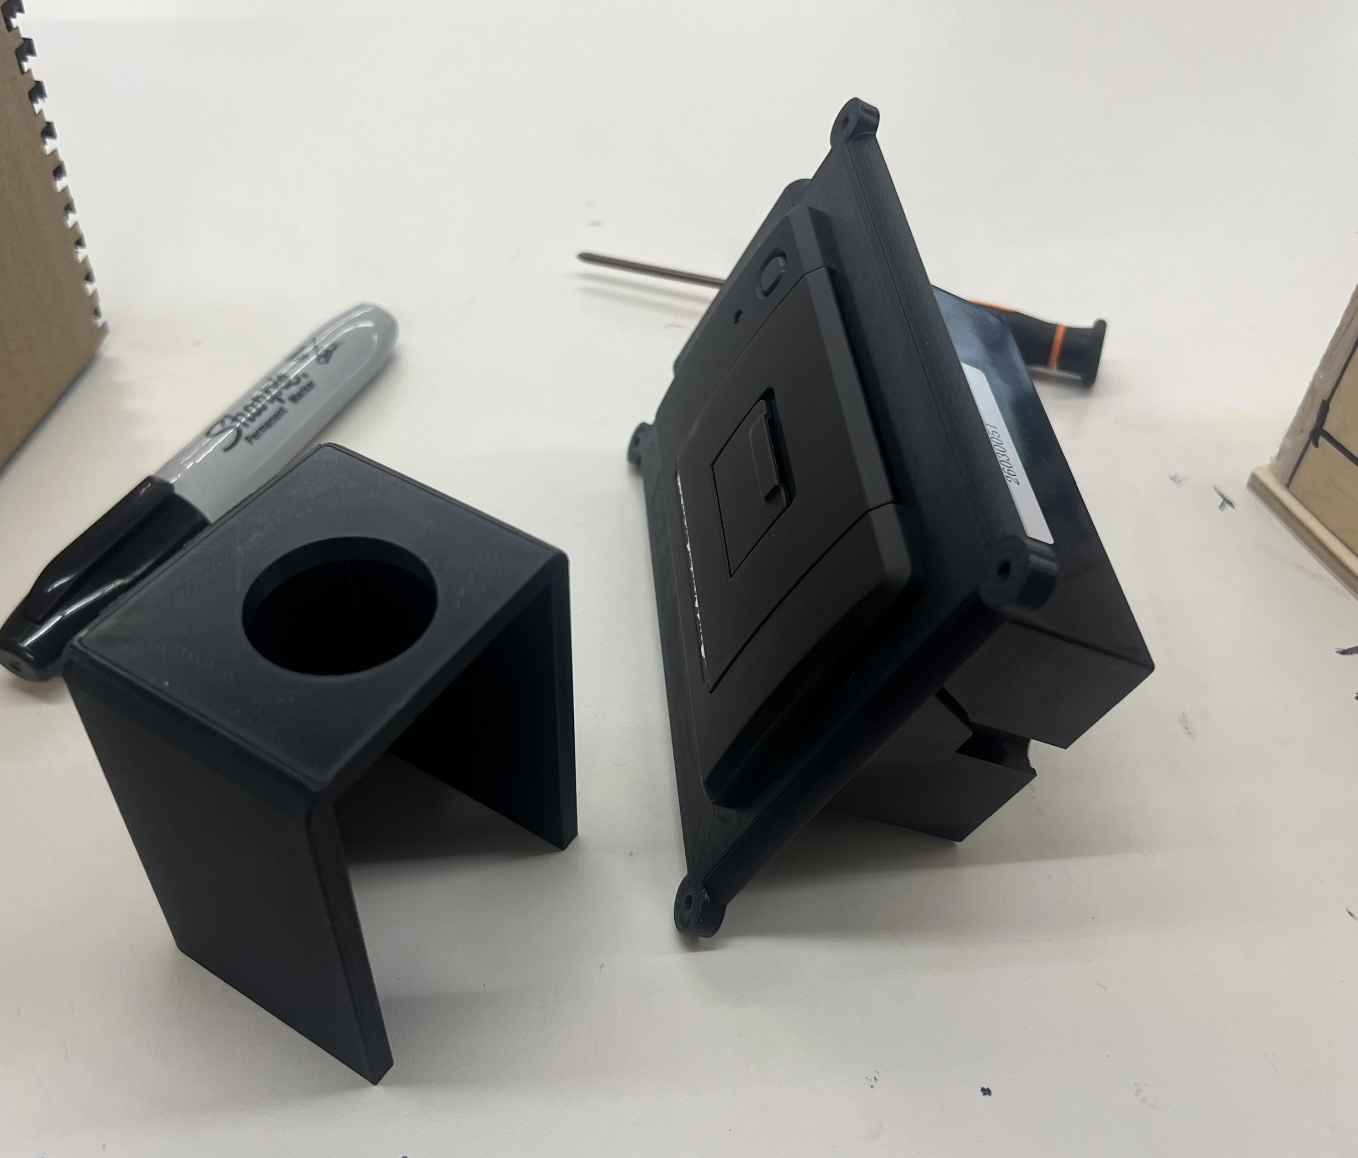
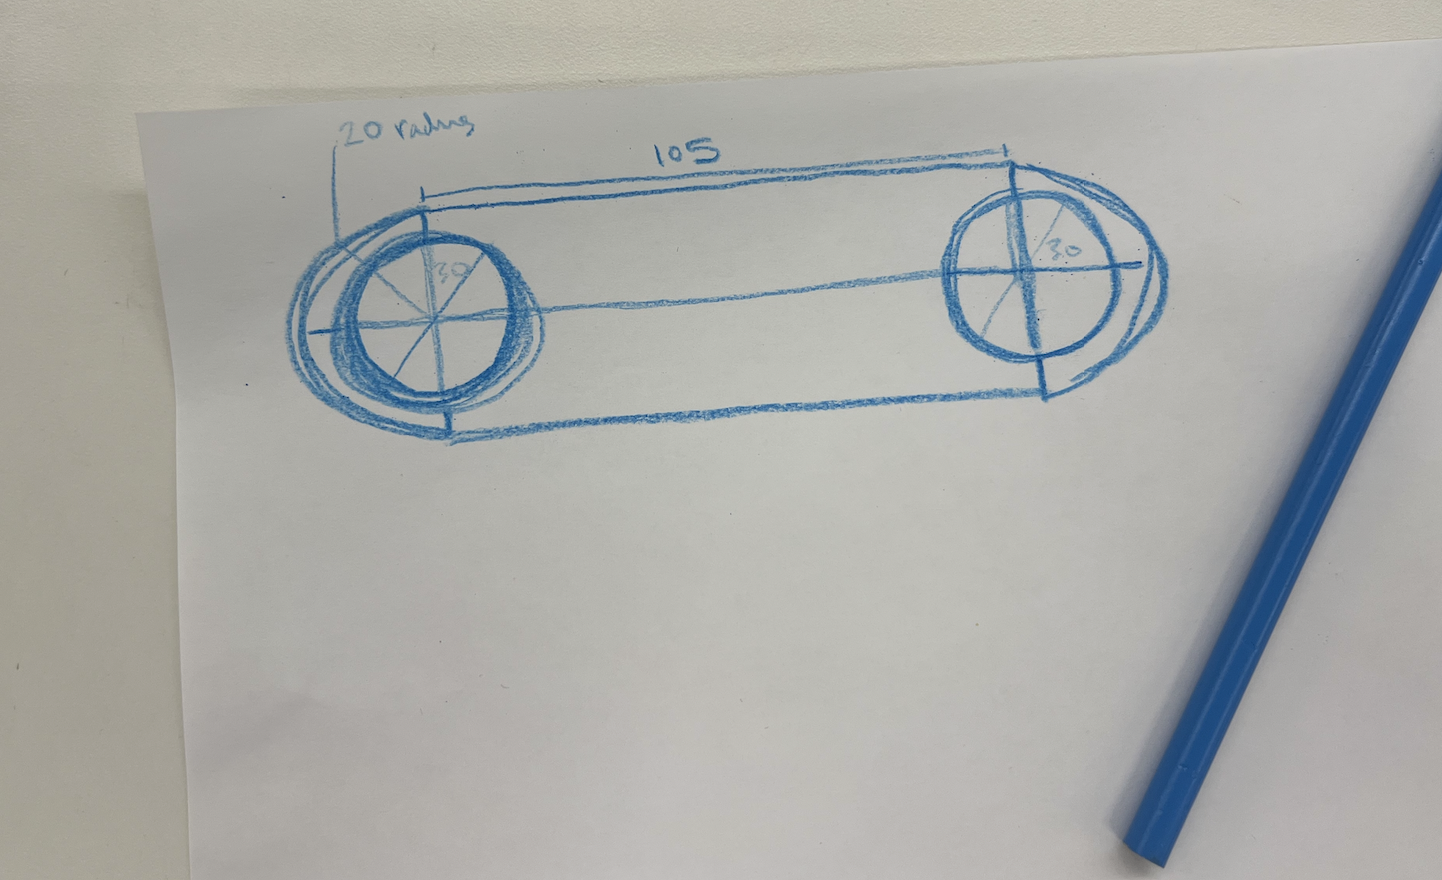
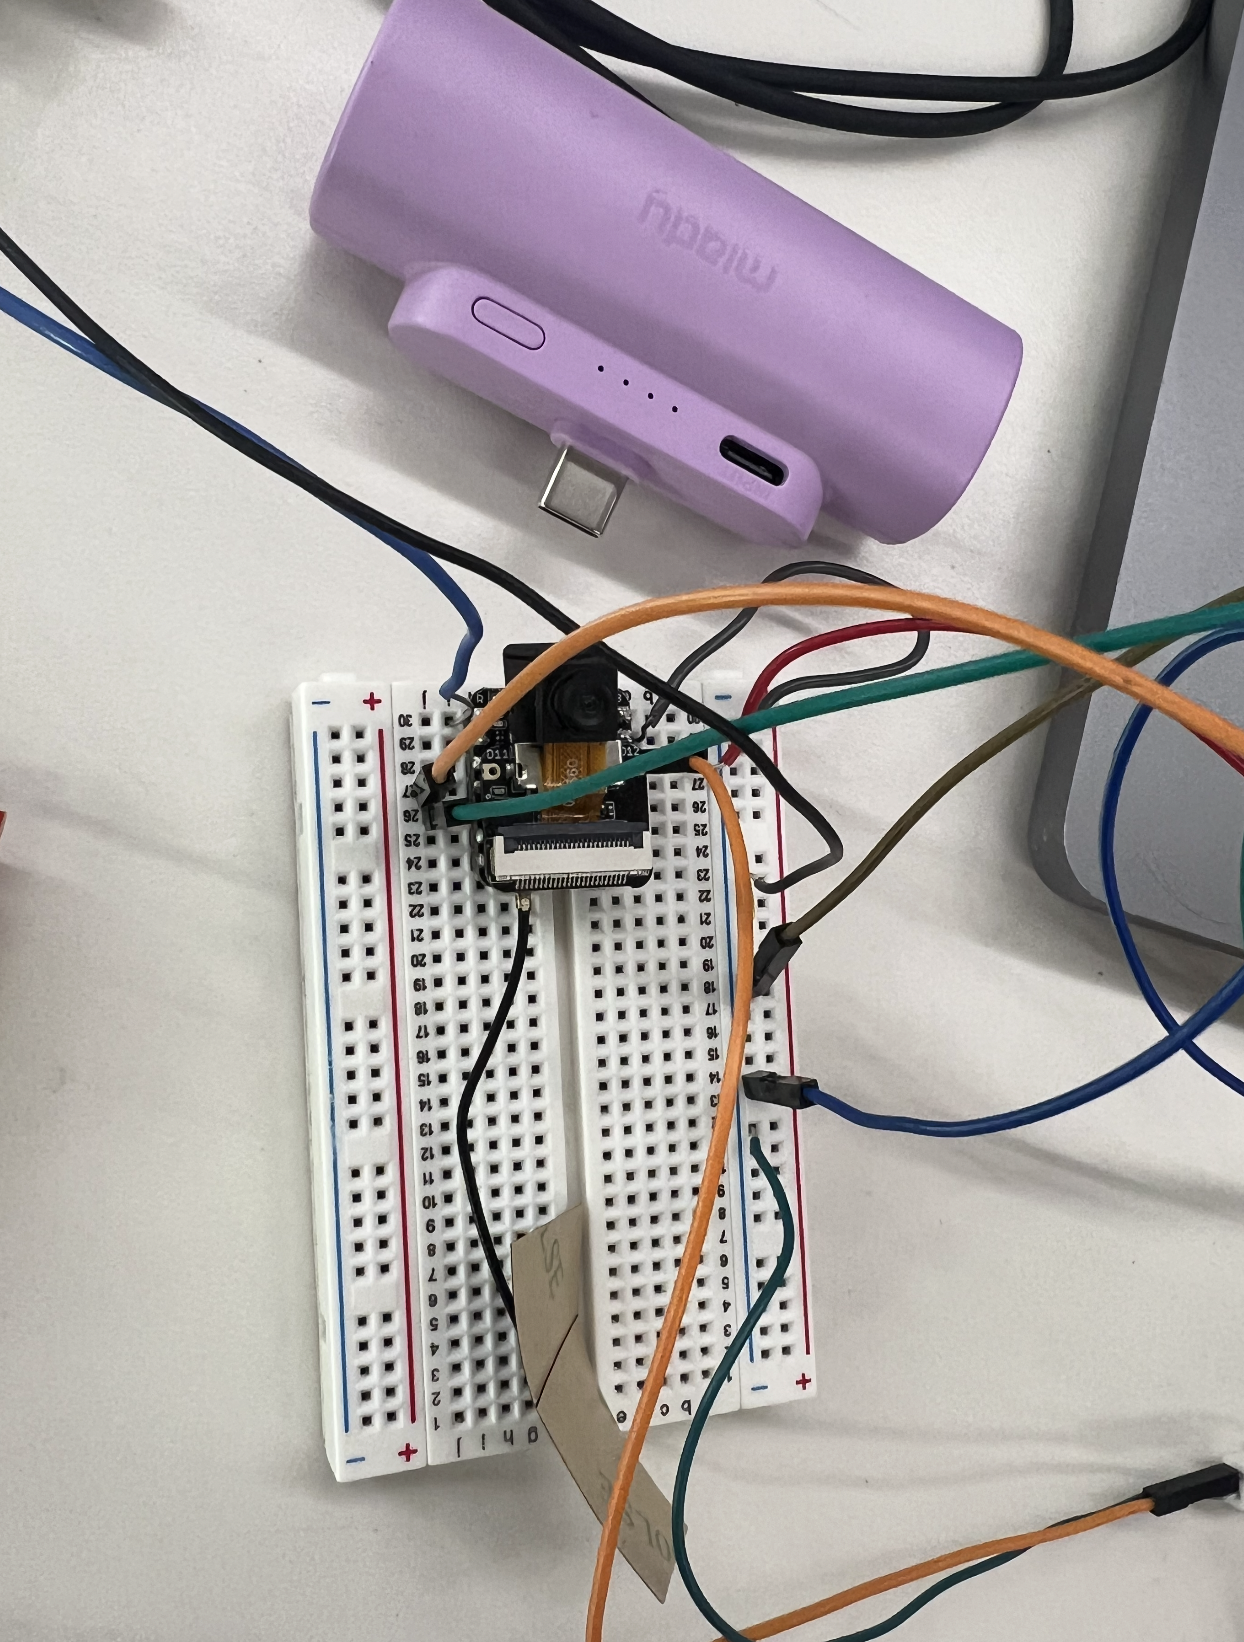
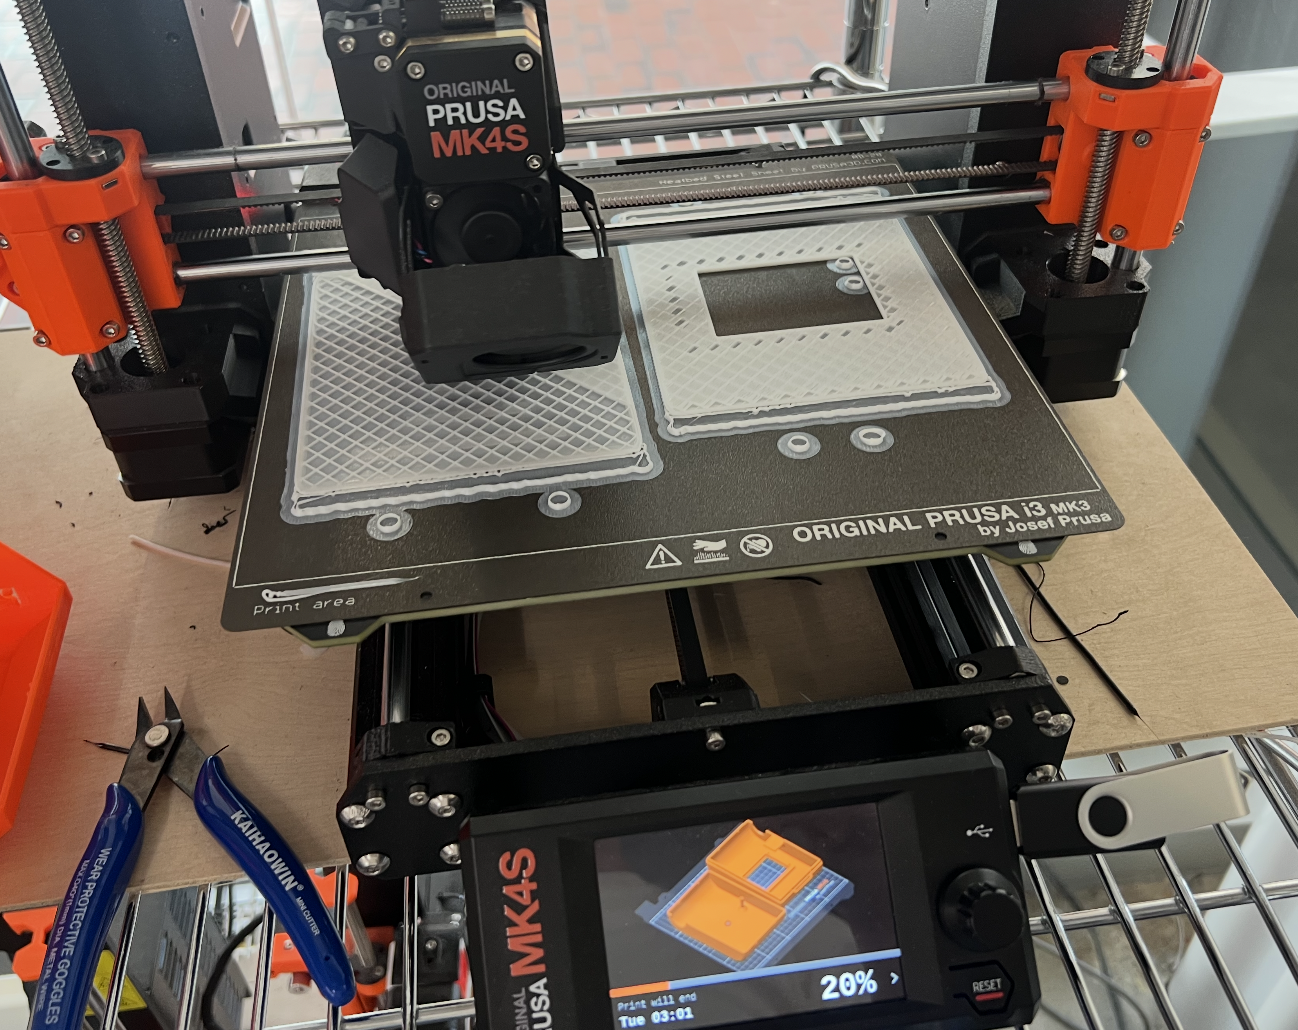
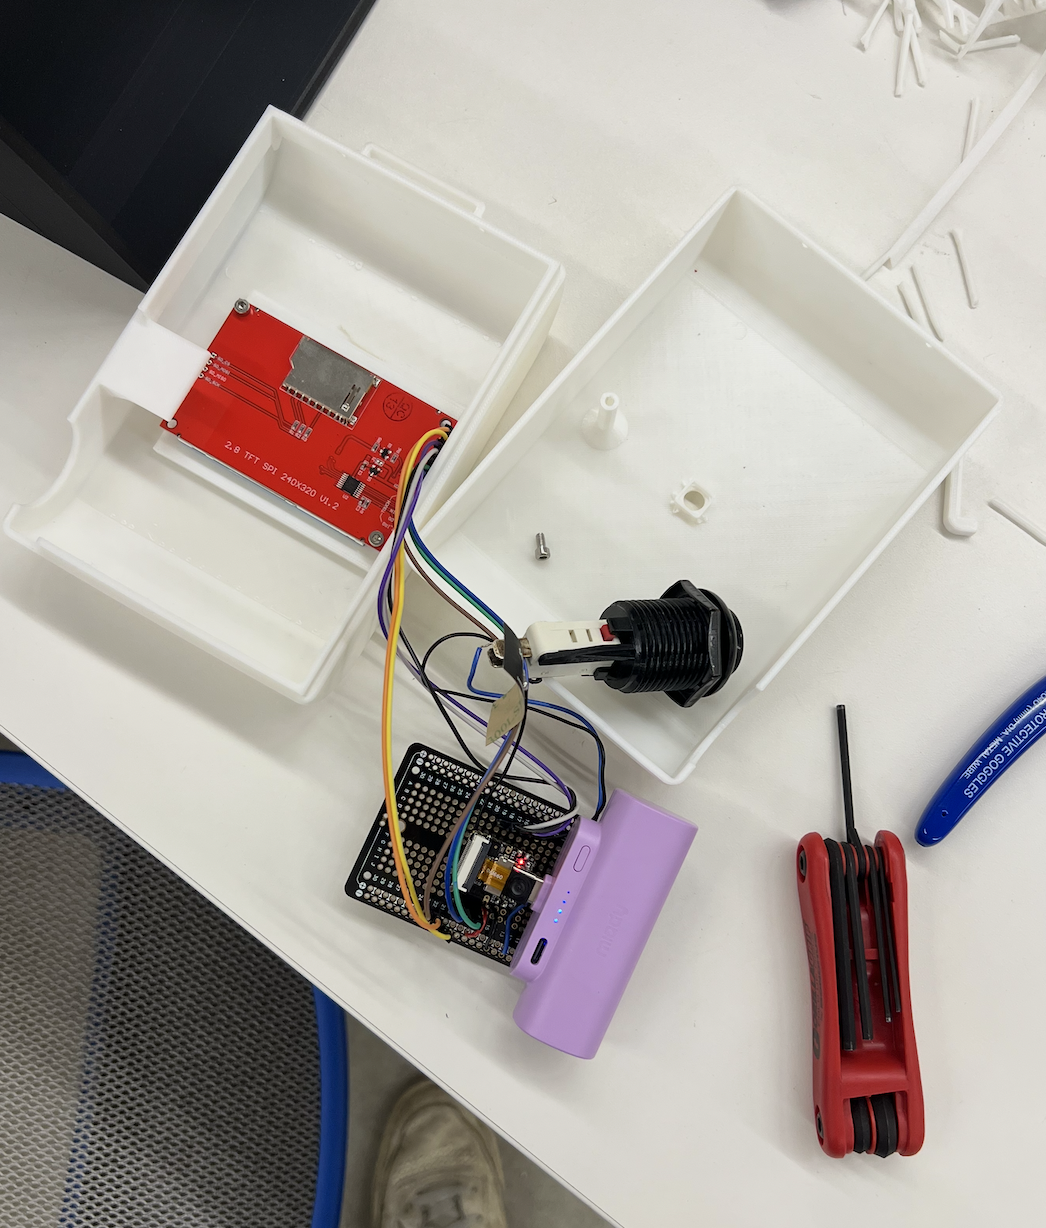
For this final stage of documentation I lay out the last components of the project, from the final designs to the final prints to the steps I took for turning this from a project to have the feel of a cohesive product. The first change that I made in the final stretch
was to update the form factor. Earlier on, and present in earlier documentation, I had originally planned to make the camera more compact. Then, when I wanted to introduce the thermal printer, I had to make it larger. I decided to base the shape and size of the camera
off of an old Polaroid camera, something that is more chunky but still has a good recognizable form and shape. Also, it needed to be something that naturally fit in the hand, as this camera is handheld.
This turned out to not be possible. The thermal printer would work, as shown below, but would not cooperate how I needed it to. Unfortunately, the printer did not get hot enough when only powered through the ESP32-S3 5V rail, and I encountered other
problems with it when hooking it up to an external 9V battery, as the text would still be too grey. After a lot of testing, I decided to pivot one final time and reduce the form factor down to the size of an old film camera rather than a digital tiny camera.
POLAROID FORM FACTOR
THERMAL PRINTER
REVISED CAMERA SKETCH
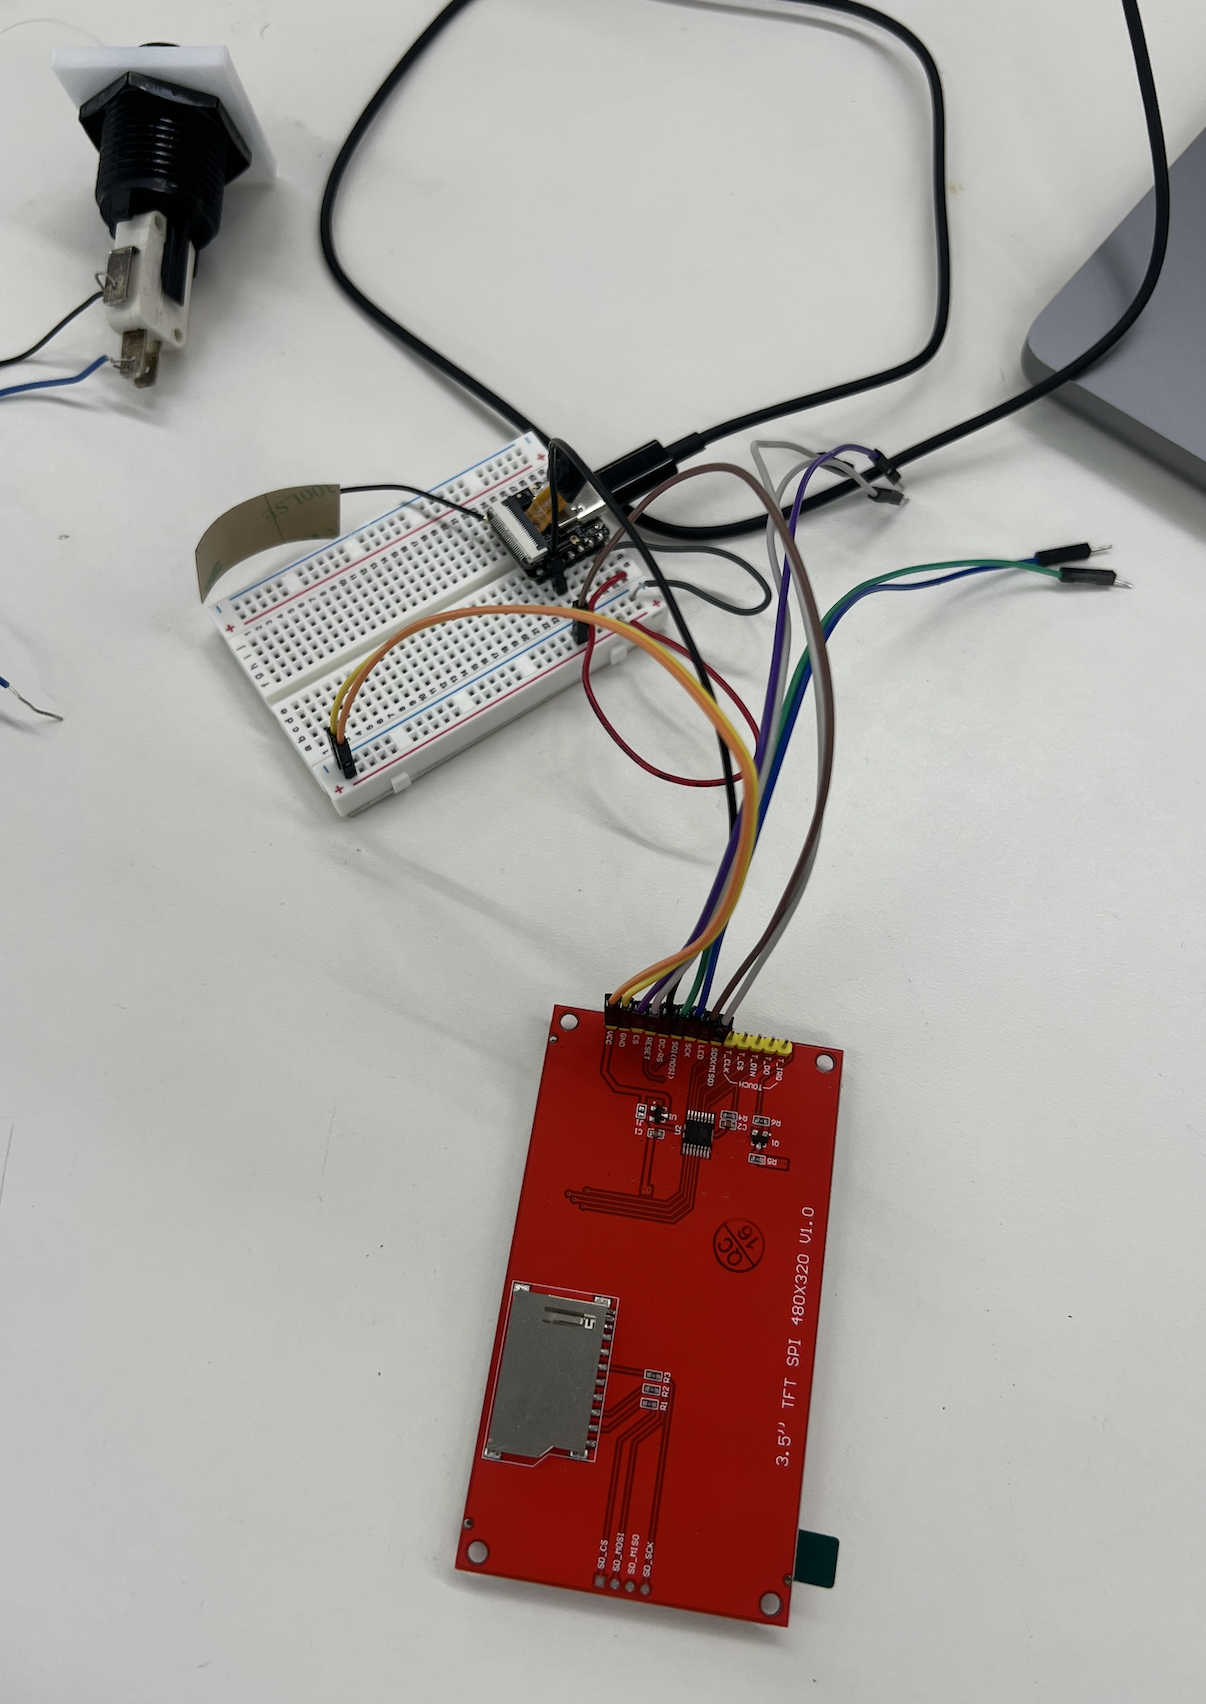
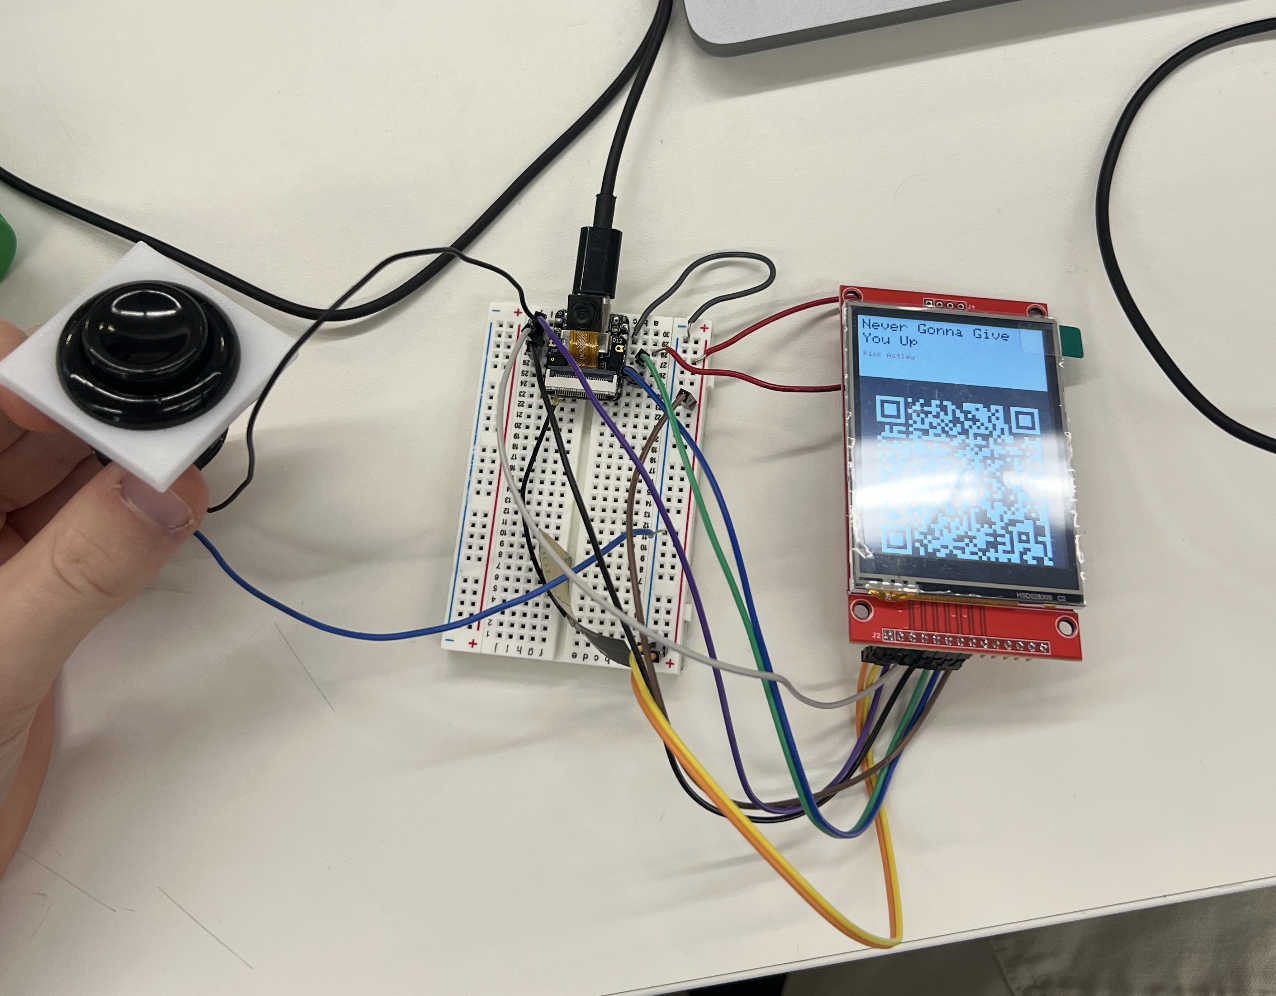
Documentation:
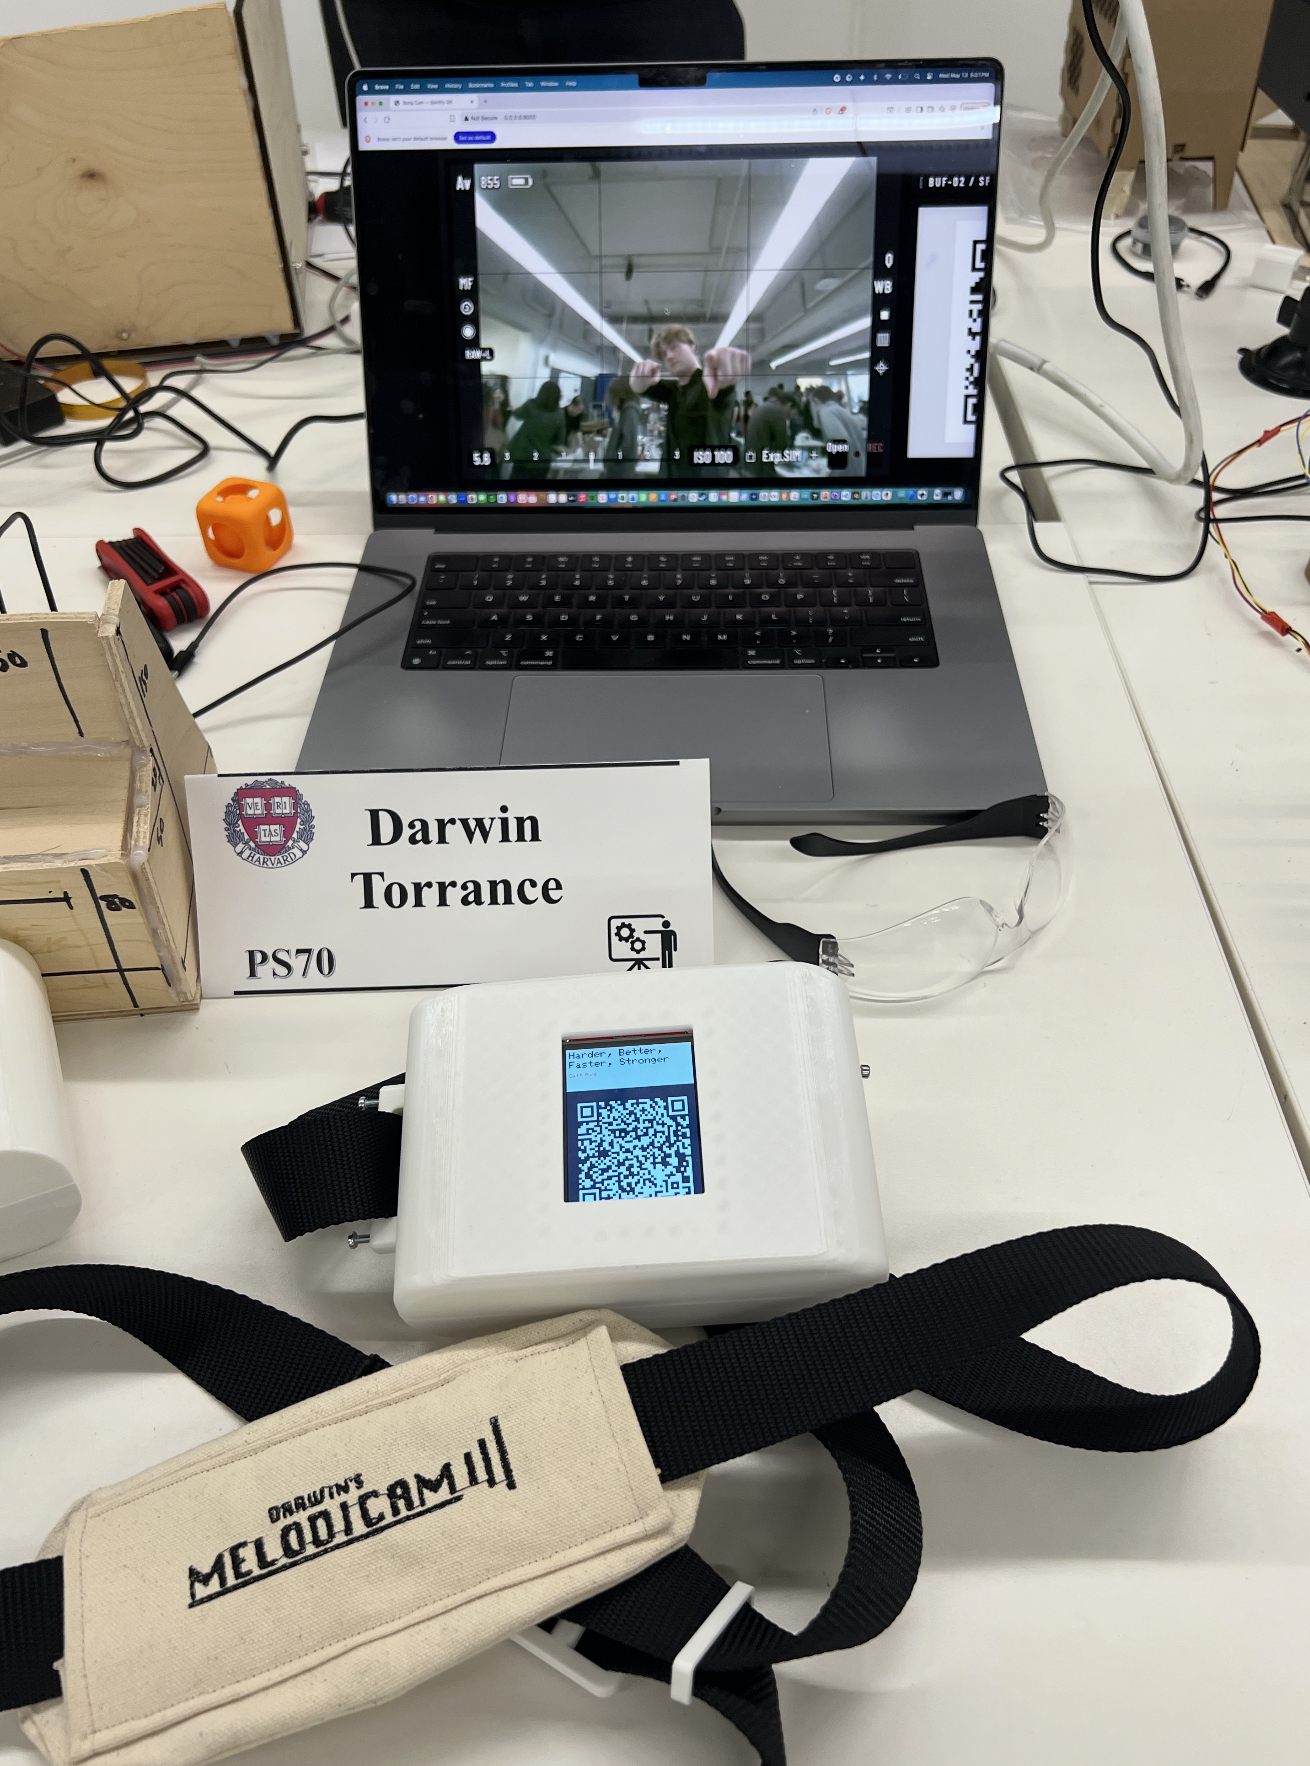
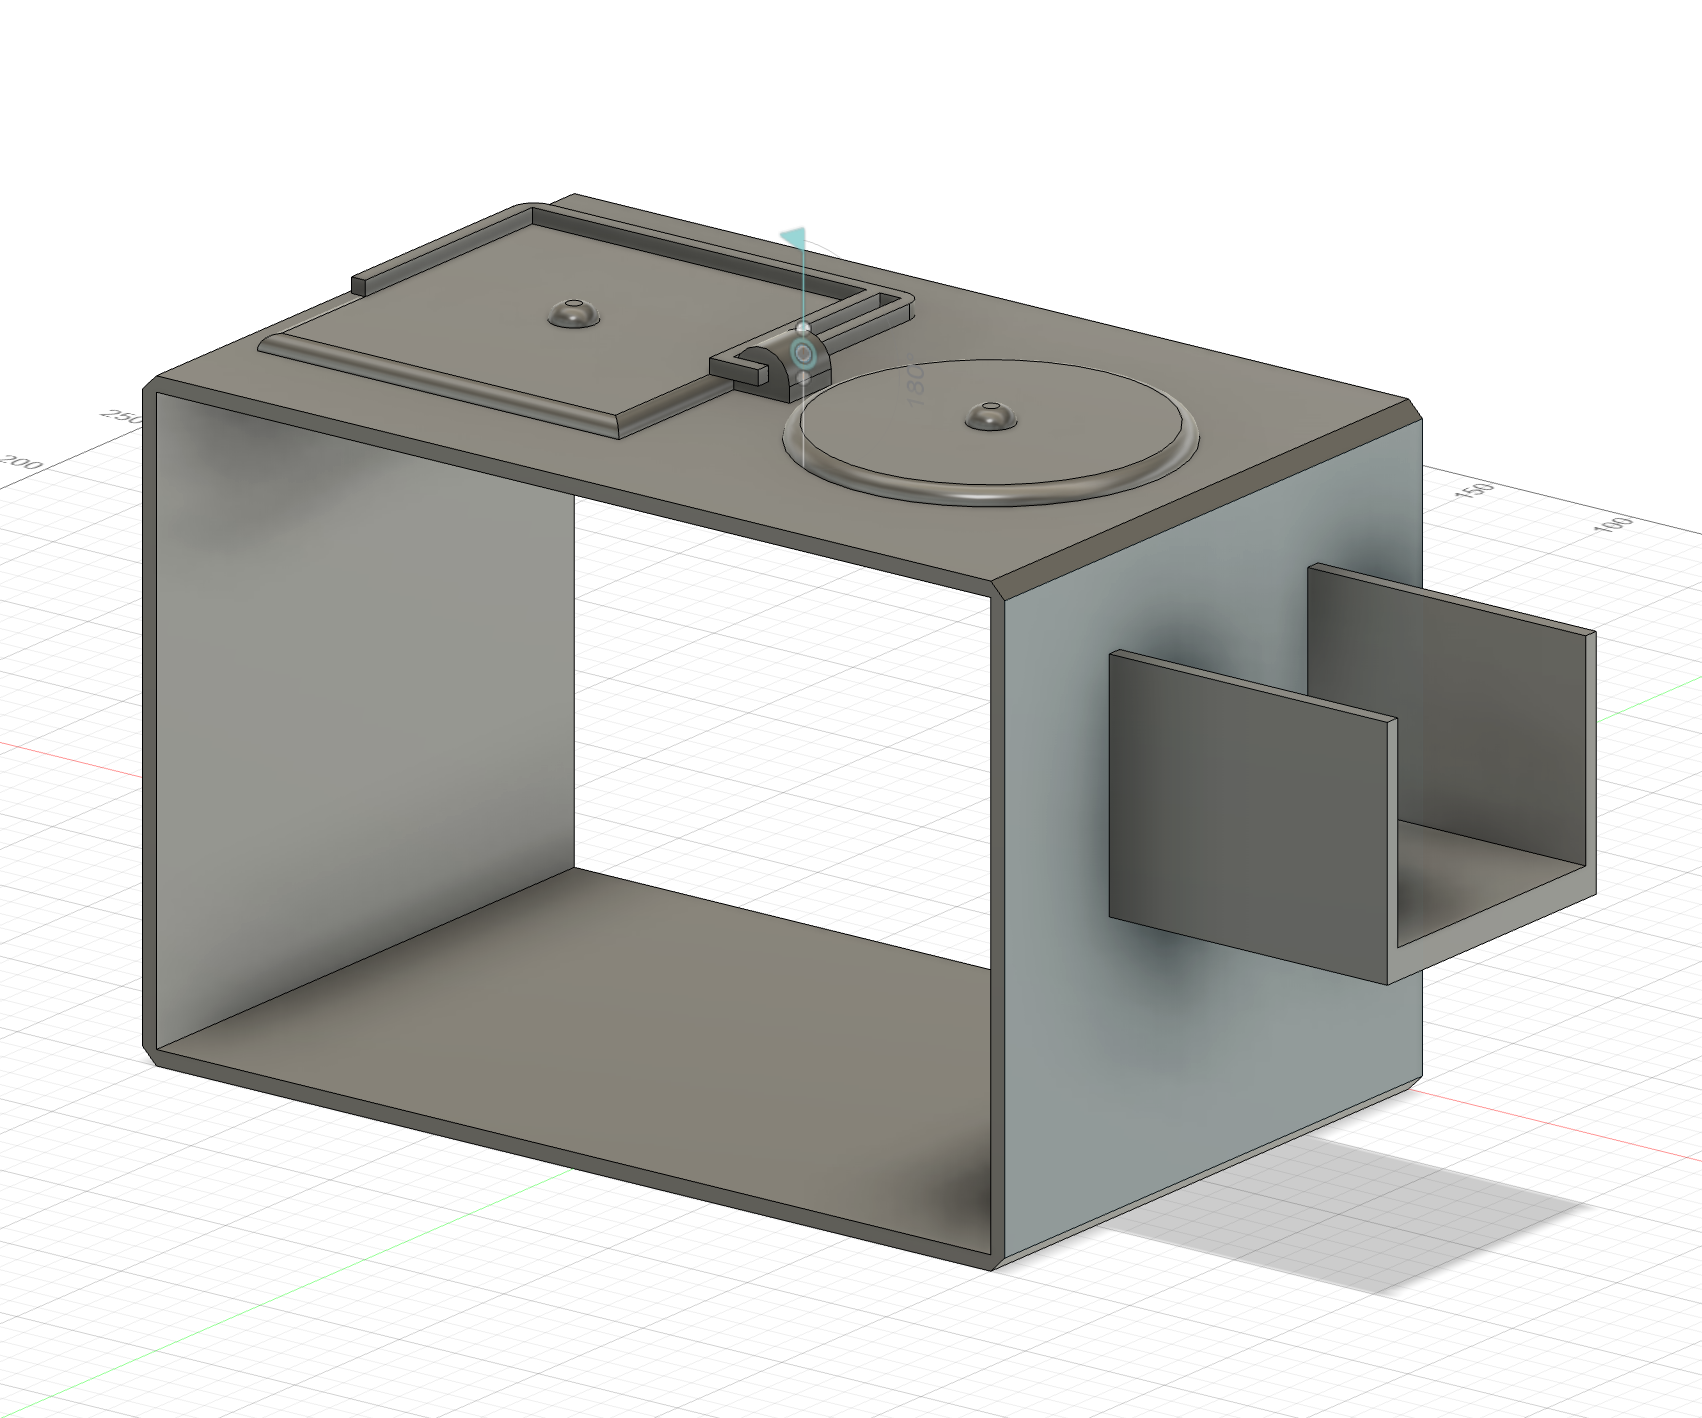
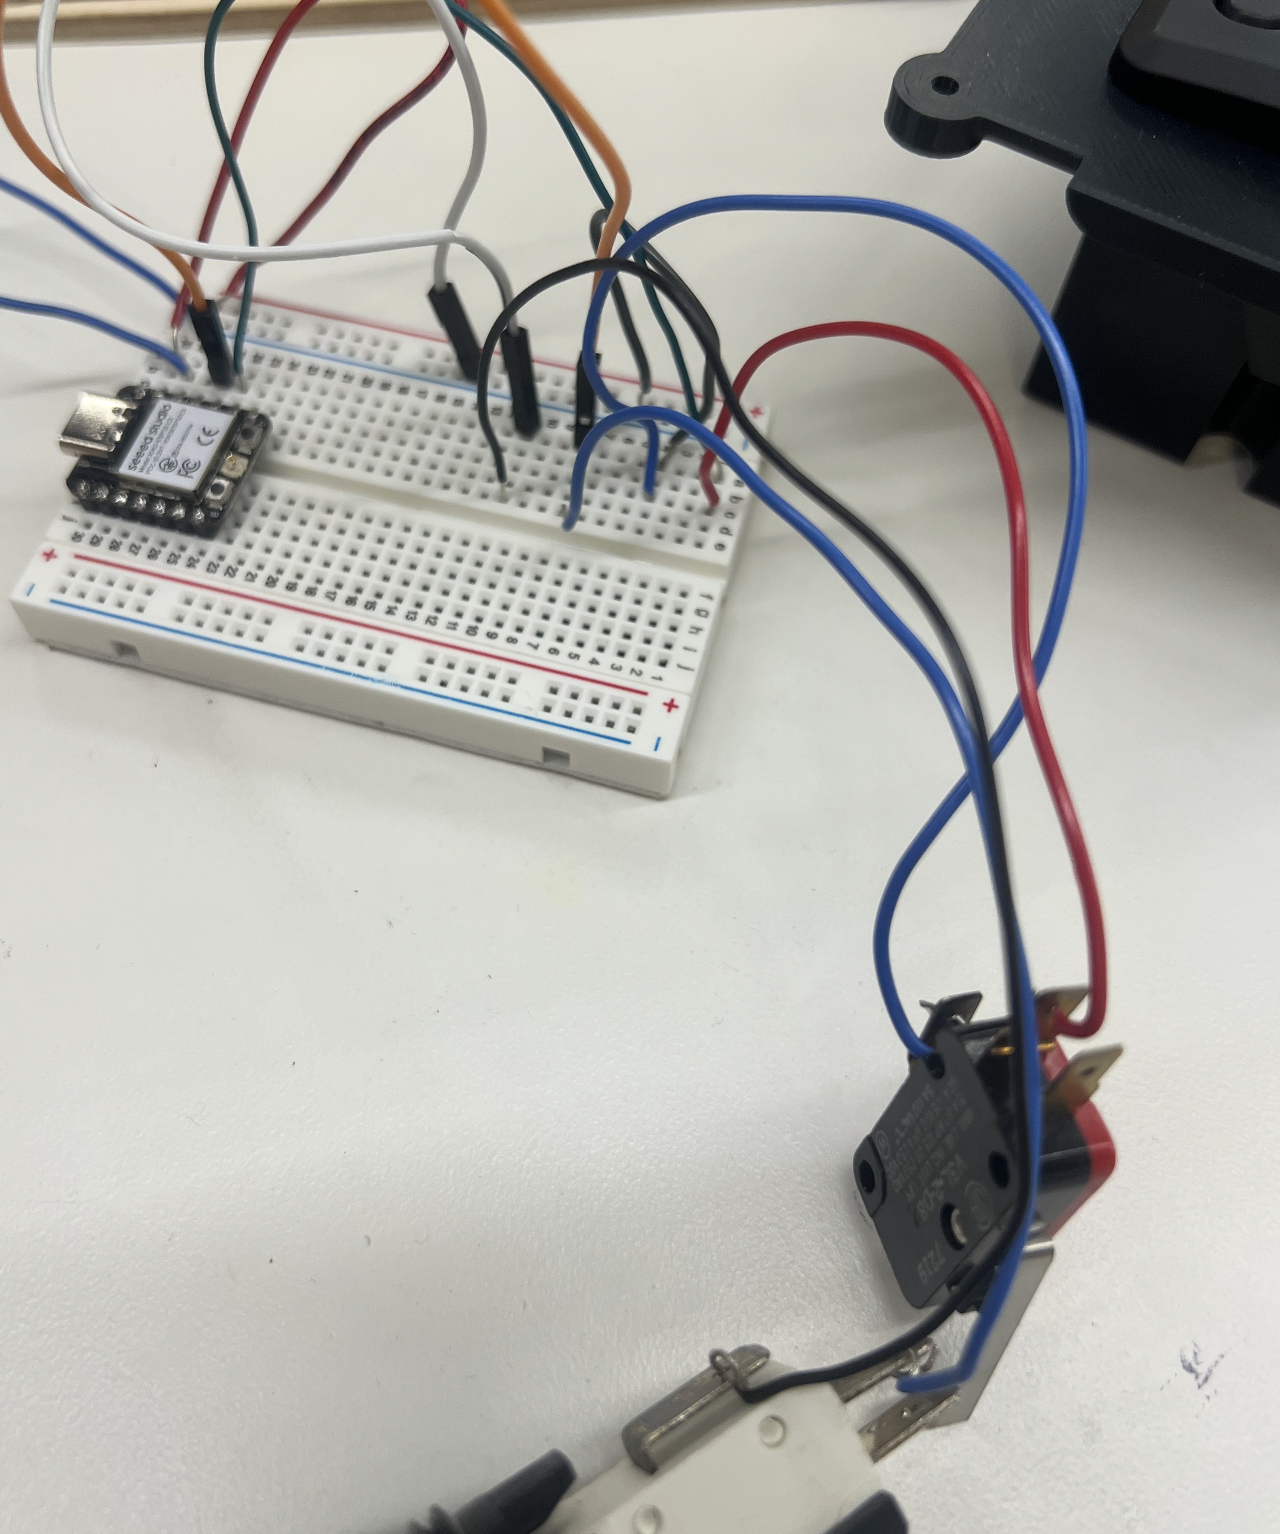
With these changes made, I could then finalize the wiring and integrate the thermal printer alternative: a screen. It turns out that the screen actually fit the vibe very well as it was supposed to look like an old camera,
and combining that with the modern style of camera the screen on the back worked perfectly to blend decades, styles and different shapes. Fighting with the screen for a few hours and with lots of help,
I finally got it to work and was able to test it out. The computer would generate the link to the song and display it on the screen as a QR code. This was the final output step
that this project had been missing for a long time until this point. I then 3D designed the housing in Fusion, ensuring that it would be press fit, securable with bolts, and able to be slightly
modular with the addition of the camera strap that was added on later. Other features can be added due to the addition of other bolt holes on the body.
EARLY WIRING AND BATTERY
SCREEN WIRED
QR CODE WORKING
FINAL CAMERA PRINT
MELODICAM HOUSING
Documentation:
After everything was assembled and tested inside and outside of the housing, it was really satisfying to hold the creation in my hands. It was one thing to watch it print, to see the software work on my computer, or to
click the button. Once everything was in the casing, I felt like all of the burden had been lifted and the project had really come together. With some final time, I was able to print out a logo for the camera using the vinyl cutter,
and got that pasted on the front of the camera. This was the last stage of finalizing the camera, and then came the accessories.
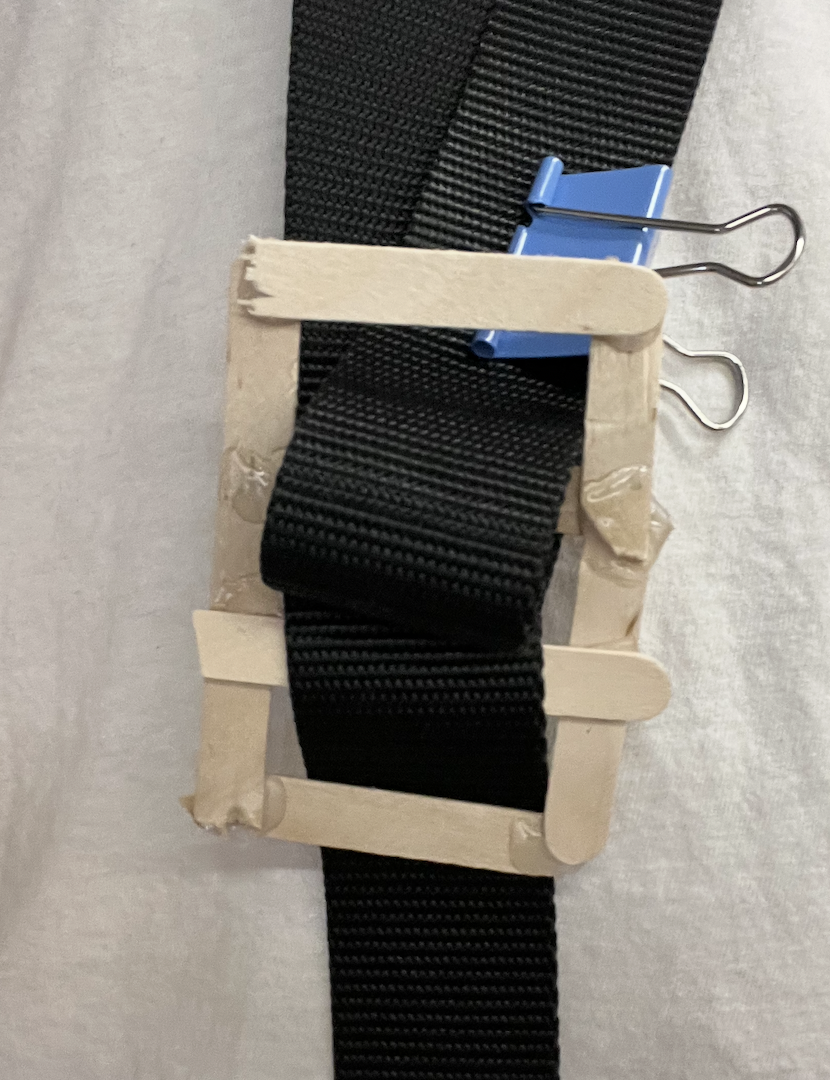
STRAP PROTOTYPE
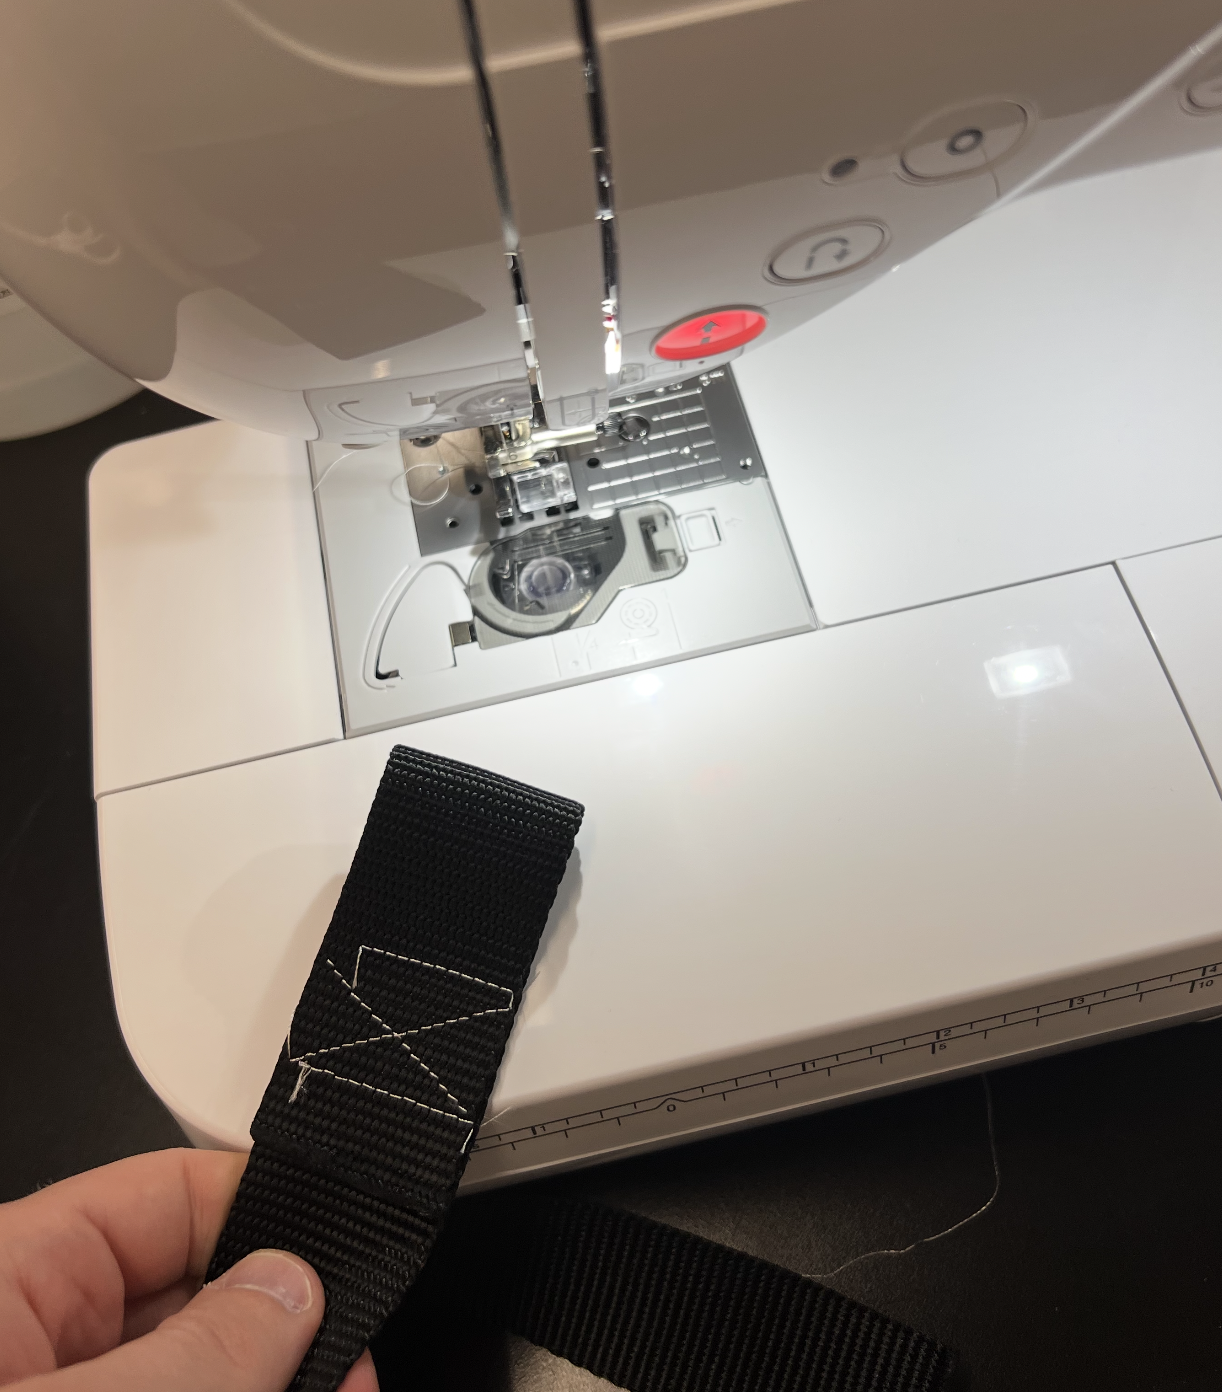
STRAP SEWING
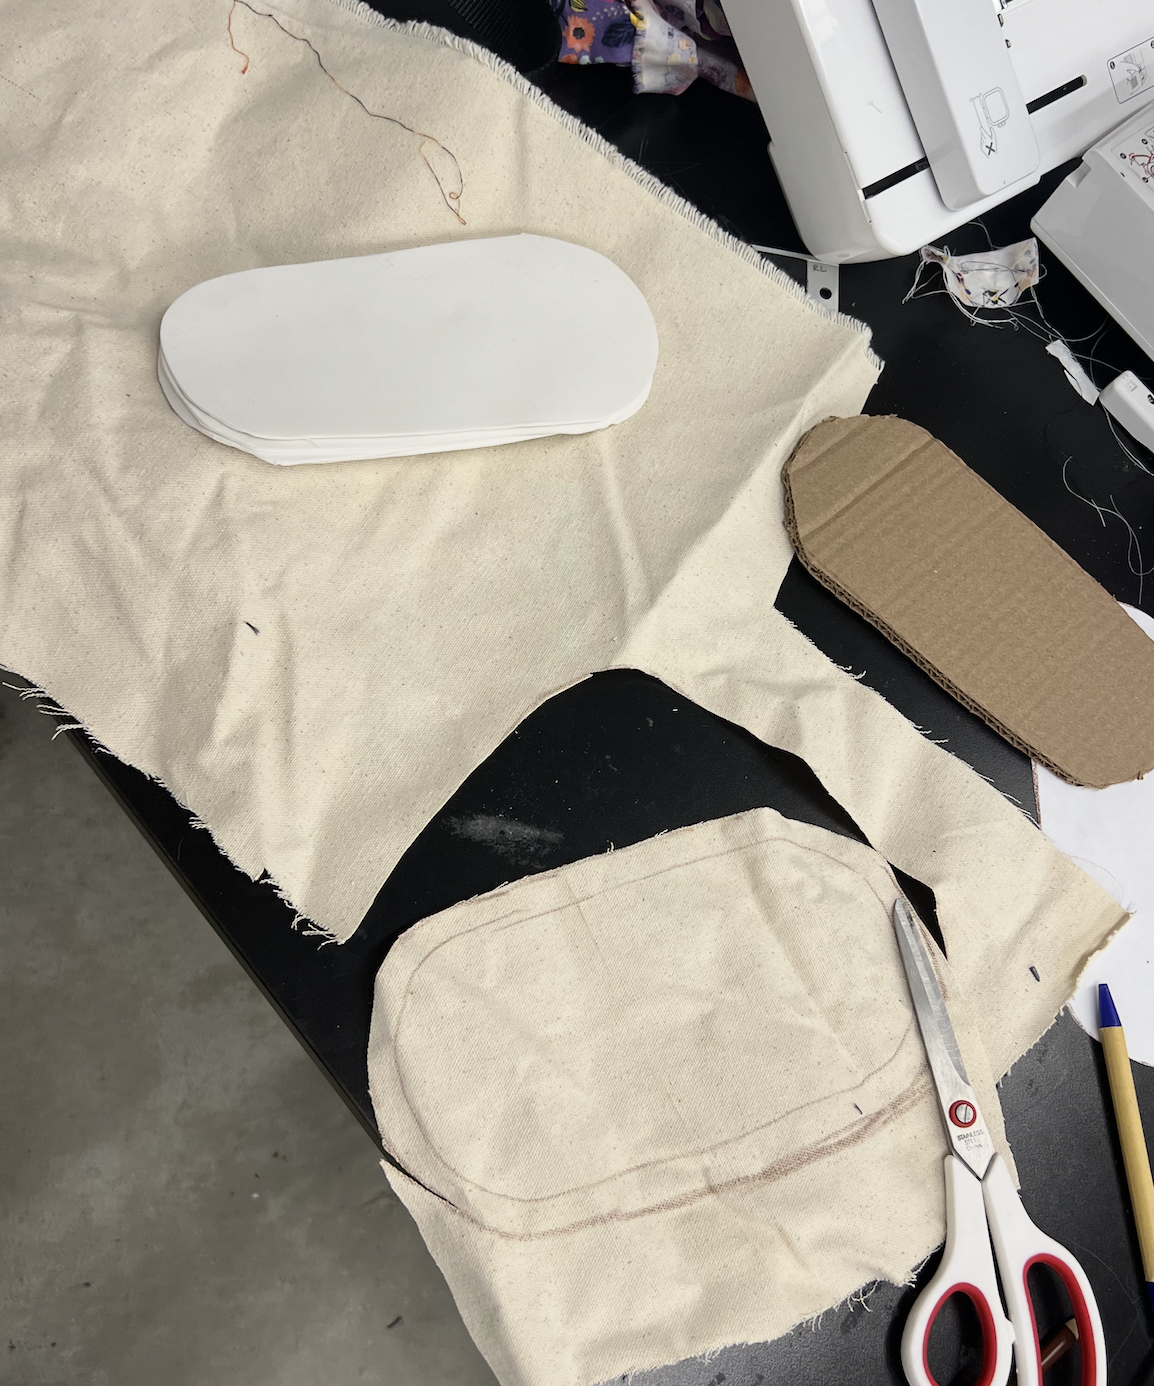
SHOULDER PAD ASSEMBLY
SHOULDER PAD

MELODICAM STRAP EMBROIDERY
MELODICAM STRAP
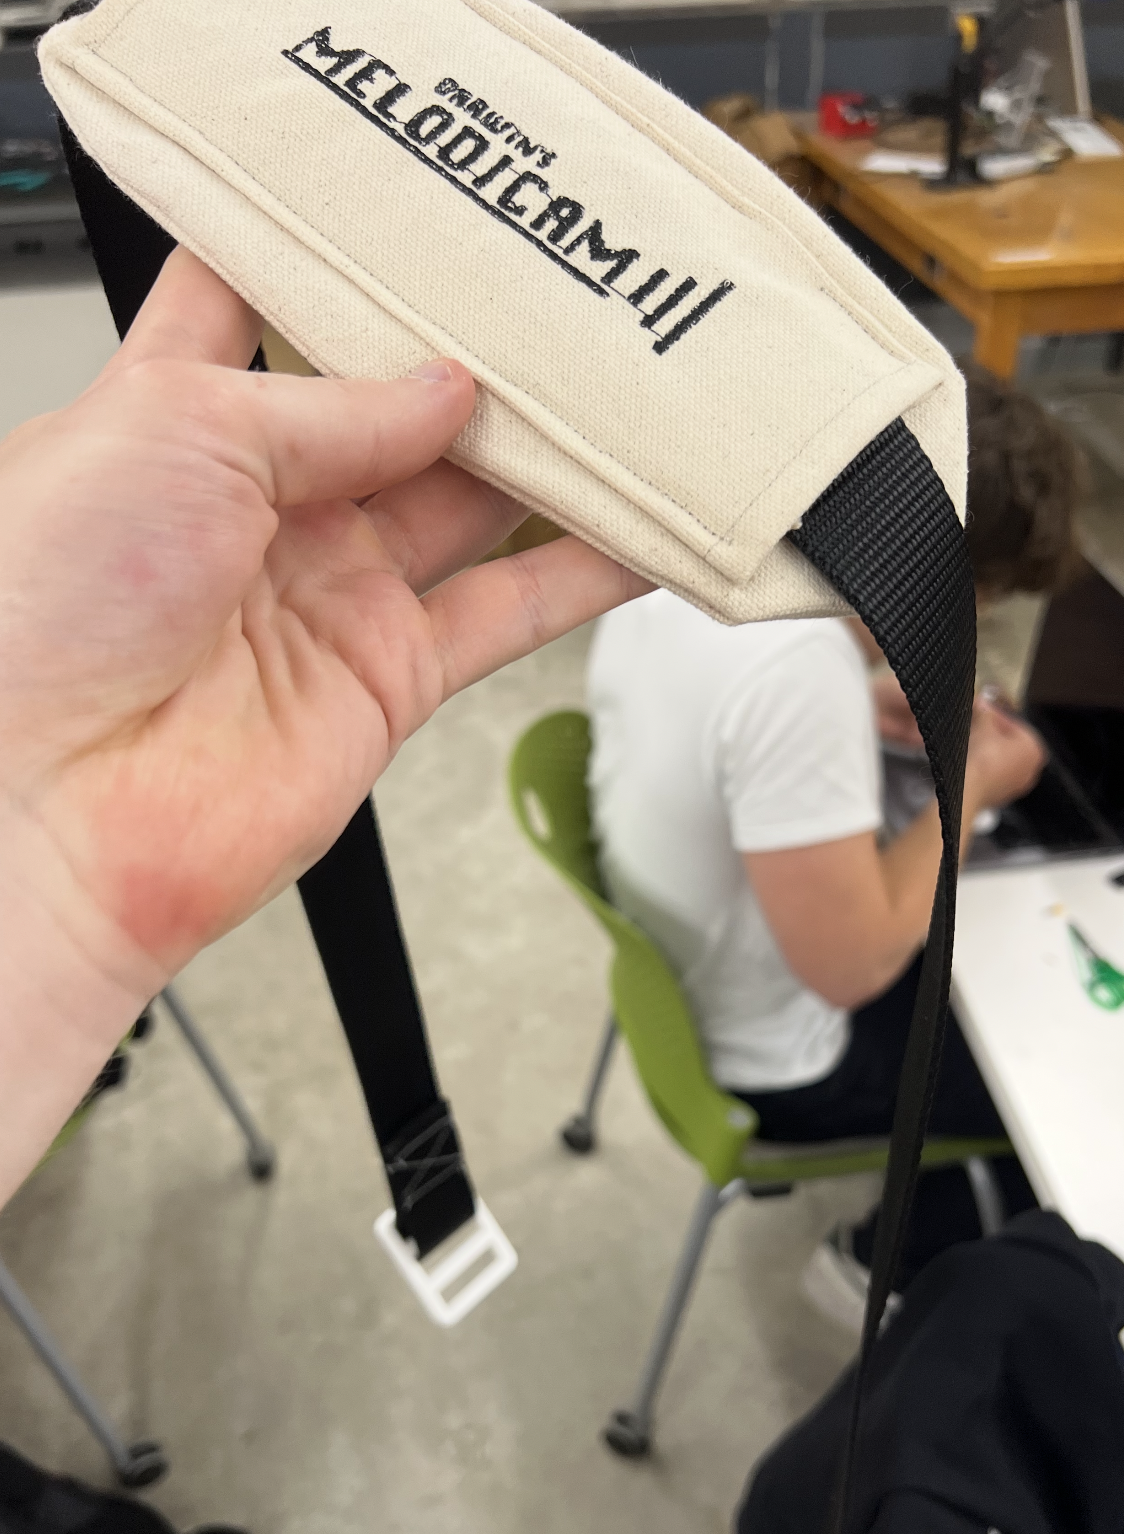
Documentation:
The final step of polish on this project was to make it feel like something that could actually be used, rather than just a box with some components. I decided that the way to do that would be to incorporate some non-technological elements to round it out.
By using the sewing machine and the digital embroidery system that it has, I was able to create a strap and shoulder pad from some canvas, thread, and foam pads that I found in the fabric box. I wanted the user to be able to hold the camera over their shoulder when taking photos so that they
would not always have to hold it. It also adds a very smooth finishing touch to the project. It turned out really well, and was an opportunity to explore and finalize the branding. I made sure that the three-line branding present on both the camera and the strap was consistent,
and it was cool to see this as a cohesive product rather than just a class project.